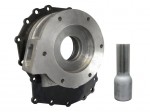
 Rock crawling is no longer just for Jeep owners. Advance Adapters now offers a specially designed transfer case for the Nissan off road enthusiast who is ready to take his truck to the next level. Swapping out your stock Nissan transfer case with the new Advance Adapters Atlas transfer case will give your truck the ability to reach deep down into those lower gears and rock crawl with the best of them out on the trails. The install into a solid axle swapped Nissan Pathfinder or Hardbody is no big deal with this new Atlas adapter. Here are the step by step instructions on how to get it done.
Order your Nissan Atlas Adapter Here.
| Images: | Preparing Your Nissan:
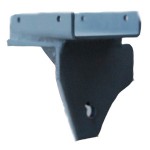
1. Start out by draining the transmission oil if you’re running a manual transmission. 2. Remove the front and rear driveshafts. 3. Remove the torsion bar cross member and unbolt the transfer case shifter from the side of the transmission. 4. Unplug the wires on the transfer case and remove the speedometer cable. 5.Unbolt the 14 bolts holding the factory transfer case to the transmission. 6. Slide the Nissan tx-10 transfer case off of the rear of the transmission and lower it out of the truck with a jack of your choice. The Atlas Adapter and Transfer Case Now the fun begins. Let’s start with the Atlas Adapter itself. 7. Bolt the clocking ring to the Atlas Adapter spacer using the supplied allan bolts. The bolt holes will only line up in one rotation so keep turning the ring until the holes line up with the holes in the spacer. Being that the tail housing of the manual transmission is not sealed from the transfer case, you will want to apply silicon sealant between the clocking ring and the spacer. 8. Notice that 4 of the 6 holes in the adapter plate are counter-sunk. The four counter-sunk holes take the allan bolts and the remaining holes take the hex head bolts. Using the supplied bolts, bolt the Atlas Adapter plate to the clocking ring turning in a clockwise rotation. In future versions all 6 holes may be counter-sunk. Again, if you have a manual transmission you will want to use silicon sealant between the Atlas Adapter plate and the clocking ring. Put the assembled Atlas Adapter in place on the back of the transmission housing and hold it in place temporarily with a couple of the supplied bolts, inserting them through the transmissions mounting holes and threading them into the Atlas Adapter plate. 9. Lift the Atlas transfer case into place onto the back of the adapter mounted to the transmission, rotate it for the most flat clocking position possible for your truck and mark the side of the input ring and clocking ring. The clocking position will vary greatly depending on how high the body sits on the frame. My pathfinder is pretty much worst case scenario having no body lift, and from what I hear, it sits lower on the frame than a hardbody from the factory. 10. Once you mark the input ring, remove the transfer case and adapter plate and install the studs into the input ring of the atlas for mounting it to the adapter assembly at the closest clocking to your markings. 11. Finish assembling the Atlas transfer case with cable shifters by following the Atlas assembly guide being sure to utilize the shift rail relocation block for additional clearance between the rear shift rail and the transmission. 12. Bolt the Atlas transfer case to the adapter assembly and secure it with the provided nuts. Remember to use silicon sealant between the Atlas and adapter when mounting behind a manual transmission.Once the adapter and Atlas transfer case are bolted together as one unit slide the spud shaft over the transmission’s output shaft and bolt the Atlas transfer case assembly into place behind the transmission over the spud shaft engaging the splines into the input of the transfer case. 13. Use the required bolts to bolt the adapter to the transmission and cut off the factory transfer case shifter mount if required for additional shifter clearance as shown in the image below. 14. With the cable shifters looping forward of the Atlas transfer case bring the shifters up through the floor where the factory transfer case shifter was located. 15. To mount the shifter box you will need to make a simple bracket. I opted to weld the bottom of the shifter box to a plate which I then bolted to the adapter plate utilizing one of the bolts that hold the adapter to the transmission. If your shifter box is mounted too high you may need to cut and bend the floorboards up a little to get the cable shifters to go forward as smooth as possible as shown in the picture. Cutting the floor may not be necessary with a shorter mounting bracket and in vehicles with body lifts. I also utilized the stock shift boot by cutting off the top part of the boot where the factory transfer case shifter originally came through and stacked the twin stick shift boot on top of the lower portion of the factory shifter boot. Once the Atlas and shifters are in place attach your speedometer cable with an adapter from Nevada Speedometer. 16. You will also need new driveshafts. I got mine from J.E. Reel Driveline in Pomona, CA. Install the driveshafts, refill your transmission with oil and hit the trail. If you have any questions regarding this install please Contact Us. |


