There is no argument when talking about the durability of a Nissan. Nissan builds strong trucks and they run forever. However, there is very little aftermarket support for them. After Playing with my 2WD Pathfinder in the dirt and getting into trouble I decided to convert it to 4WD just one year ago. I wheeled my Nissan Pathfinder over the last year and began to push the limits of all my modifications including my 3″ Calmini suspension lift. I began to look into bigger options, but they all fell short of what I was looking for. It was brought to my attention that the All-Pro Off Road 3-Link SAS kit for the Toyota Tacoma may work on a Pathfinder.
I started doing some homework and the idea looked promising. Before long I found myself picking up parts from All-Pro Off-Road and hauling them away to get the project started.For the build I started with my 1990 Nissan Pathfinder with 367,000 on the odometer. Yes 367,000 but that’s another story. The objectives here are to torch out the Independent Front Suspension (IFS) and do a solid axle swap with a rebuilt Dana 44 I pulled from a 1984 Jeep Wagoneer. This 61″ wide axle is slightly wider than the 59″ stock Nissan H233B rear axle, which isn’t enough of a difference to worry about narrowing it.
 I got the Dana 44 back to the garage where I cleaned it up, replaced the wheel bearings, and mounted the hubs and rotors. The differential housing will remain without gears and shafts until after the axle is mounted under the truck, but I put enough of it together to mount wheels to it and have it roll.
During the homework stage of this project I had been talking to Troy at California Mini Truck. They had used the All-Pro 3-link on many Toyota Tacomas and even once on a 4-Runner. They had referred me to Andreas, who was willing to do the build in his garage. Andreas is great at building trucks and has installed the All-Pro Off-Road 3 link on many trucks. He has been in many magazines and has turned out many great Toyotas in the past. Knowing this I willingly handed over the project Pathfinder to him.
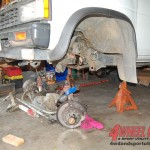
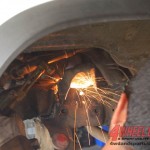
When I went to check on the progress the next morning, all of my front drive train and suspension was sitting in a pile right under the truck which was being held up by jack stands. Andreas reached for the torch and started burning out all the IFS brackets, revealing nothing but a clean bare frame, which is just what we want.
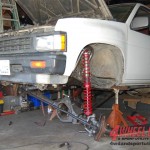
Once the upper control arm brackets, lower control arm brackets, and shock towers were all cut away, Andreas rolled the axle into place, suspending it from the frame with ratchet straps. He then started taking measurements for the suspension linkage and shock hoops.
The link brackets were then tacked into place on both the frame side and the axle side, making us aware that we were going to have to somehow customize the upper link. The problem was that the wide part of the frame was slightly wider than a Toyota Tacoma’s and the narrowed part under the engine is slightly narrower, therefore having a more intense curve to the frame. This curve was getting in the way of a straight shot from the upper link mount on the frame to the mount on the differential housing. For now the upper link was secured in a temporary place on the frame side, so we could revisit the issue once everything else was in its final location and all the other links were adjusted.
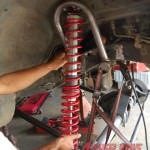
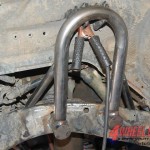
The shock hoops were due to go in next. The shock hoops I decided to use were from All-Pro Off-Road, but are not the coil over mounts that are included in the 3-link kit. They are the shock hoops from the older Toyota pickups which extend a few inches higher into the wheel well, utilizing the space a little better. Also, using these hoops would allow for better placement of the mounting position of the coil over shock. With the axle still suspended from the frame, Andreas began figuring out where the hoops were going to go and tacked them in place. Having installed this kit on many Tacoma’s in the past, he knew where the coil over needed to be mounted in order to keep everything operating properly.
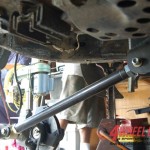
Once the hoops were welded in, the coil over shocks were mounted. Without any problem, we then put in the track bar using the All Pro brackets on both the frame side and axle side. I’d go into more detail, but Andreas was the one working the magic.
For the steering system we used the Jeep Wagoneer Tie Rod and fabricated the Draglink with heim joints on each end. This setup will work for now, but we eventually will go to a hi-steer setup.
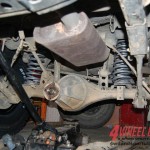
For now, the rear suspension will utilize the factory links and modified front 5.5″ Rubicon Express Jeep TJ Springs were used for the lift and longer Rancho 5000 Shocks were installed. In order for the TJ Springs to fit we had to cut off the last loop on the coil where the diameter of the spring gets smaller.
The trackbar relocation bracket I used is from Trailmaster’s 4″ suspension lift. We obviously have more than 4″ of lift on this truck but the bracket got us in the ball park and will work until we build an adjustable rear trackbar. The slip yoke on the rear driveshaft is long enough to not have a custom driveshaft made, however we did have to notch the cross member for driveshaft clearance due to the increased driveshaft angle.
Next, we had to make some room for the front driveshaft. The front driveshaft originally ran above the transmission cross member to the differential that was mounted to the frame for the IFS setup. Now, however, the driveshaft will be moving up and down through the area where the cross member currently sits. The cross member was cut and Andreas fabricated half of the cross member so it would now run above all of the suspension linkage and front drive shaft. He also cut off, modified, and re-welded the transmission cross member frame mounts to fit around the suspension link brackets on the frame.
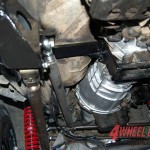 At this point Andreas was done with the exception of the upper link with a clearance issue to work out, but Andreas was able to bend the All-Pro upper link to make the necessary clearance around the bend in the frame. Over time, this link may continue to bend and a different solution may be required, but so far it hasn’t had any problems and it seems like it will hold up well. However I will be keeping an eye on it
With Andreas’ suspension work done, we flat towed the truck to Speedway Muffler, where they custom routed the exhaust system around all the new linkage and replaced the current rusted out muffler with a Flowmaster 40 Series muffler. When the new exhaust system was installed we found out that the headers had a leak, so they were then replaced by ceramic coated Doug Thorley Headers.
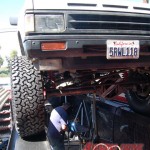 Once I got the truck home we started to cut the fenders to make room for our 35-inch BF Goodrich All Terrain tires. I wanted to keep the factory lines on the truck so I traced the outside of the factory fender flares, then it was just a matter of following the line with a die-grinder.
The Last step to getting this truck on the road was to hook up the brake system. I used the stock Jeep Wagoneer calipers up front and got steel braided brake lines made by G & J Aircraft in Montclair, CA.
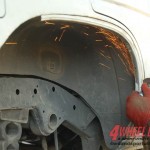 After bleeding the brakes and doing the best driveway alignment we knew how to do, we went for a drive around the block, which was scary to say the least. The truck was all over the road pulling back and fourth unexpectedly. We never even went over 20 MPH. When the truck was IFS, I never had the rear sway bar in. It had some body roll on the road but it was manageable. But now with the taller suspension the body roll was out of control and as soon as I got it back in the driveway, the rear swaybar was the first thing to go back on.
We also felt that the 100/300 springs that All-Pro uses on the Tacoma is way too soft for a Pathfinder. After showing the truck and explaining my problem to Greg at PRG Products, I ended up swapping out the springs with 300/400 springs which helped a lot but I will be playing with springs a bit more to get things dialed in perfectly. I also feel that the shocks need a little stiffer valving, but at least we are now able to drive around town hitting speeds of 45 and 50 MPH.
With the truck driving better, we finally took it to Jack at Eckles Alignment in Ontario, CA to get it aligned. The truck still wanted to pull back and fourth unexpectedly after being aligned, but Jack found that the preload on the upper ball joints were set way too tight and needed to be loosened up, and he did so the following day. Once the ball joints were re-installed correctly, the truck was capable of reaching highway speeds and I cruised home at about 70 MPH on the freeway, smiling as people cruising next to me pointed at the pathfinder and gave me the thumbs up.
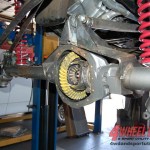 At this point in the project, we were able to drive but we still had a few things to take care of to make sure the 4 wheel drive functional. For instance, we had to get the internals of the front axle in. To assemble the front axle, we went to Rose Auto Clinic in Montclair where their gear guy, Jeff, installed our 4.88 gears. Jeff also installed our chromoly axle shafts from Superior Axle and Gear and got our WARN manual locking hubs in working order. Again I would go into more detail here but Jeff was the one working the magic on this.
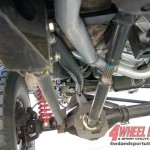 For my front drive shaft I went to J. E. Reel Driveline in Pomona, CA where Scott measured for my front driveshaft and had it ready for me in a few days. It looked like the driveshaft angle wouldn’t be too bad, until I noticed that the front output on the transfer case is angled back. Also, the pinion angle on the front differential was pretty low to keep the caster in check without having to cut and turn the axle. When we first installed the drive shaft, the u-joints would bind. The driveshaft uses 1310 u-joints and mates up to my Nissan TX-10 transfer case with a flange adapter that J. E. Reel built. It turned out that the minor length difference between the J E Reel adapter flange and the Spicer one that is available would very slightly lessen the drive shaft angle and also give the u-joints just enough clearance to operate with the suspension at near full droop.
The last piece to the puzzle was getting the 4.88 gears in place of the rear axle. This opened a can of worms as I began to discover that there were slight differences in different year differentials. It was all mind boggling but eventually contacted Nissan Motorsports where they were a great help in filling me in. I had basically been running in a confusing circle, but in the end I found that the difference in the gears where a part number superseded an old one, so it was nothing to worry about. I had nearly gone crazy trying to get all the right bearings and seals but after a visit to a couple local bearing shops, I gathered everything I needed. I dropped off the Pathfinder at California Mini Truck in Montclair, CA, where Manny tore down my 3rd member and got it all back together with the new parts. With the 4.88’s in place, my project Pathfinder was done… at least until “Phase 2” starts to unfold.
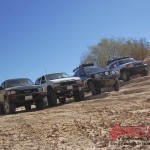
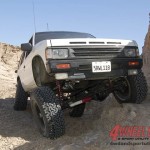
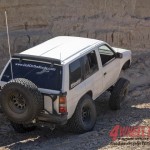
Although I did origianlly write this article, It was originally posted at: http://www.4wdandsportutility.com/tech/0710_4wd_1990_nissan_pathfinder_suspension/index.html
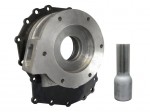 Rock crawling is no longer just for Jeep owners. Advance Adapters now offers a specially designed transfer case for the Nissan off road enthusiast who is ready to take his truck to the next level. Swapping out your stock Nissan transfer case with the new Advance Adapters Atlas transfer case will give your truck the ability to reach deep down into those lower gears and rock crawl with the best of them out on the trails. The install into a solid axle swapped Nissan Pathfinder or Hardbody is no big deal with this new Atlas adapter. Here are the step by step instructions on how to get it done.